# Cherokee Makerspace

## Additive

<table data-view="cards"><thead><tr><th></th><th></th><th></th></tr></thead><tbody><tr><td></td><td>Filament 3D Printers</td><td></td></tr><tr><td></td><td>Resin 3D Printers</td><td></td></tr><tr><td></td><td></td><td></td></tr></tbody></table>

## Metalworking

<table data-view="cards"><thead><tr><th></th><th></th><th></th><th data-hidden data-card-cover data-type="files"></th><th data-hidden data-card-target data-type="content-ref"></th></tr></thead><tbody><tr><td><strong>Bridgeport Mill</strong></td><td></td><td></td><td><a href="/files/RpaqRB6F8QXJYt7SKaN7">/files/RpaqRB6F8QXJYt7SKaN7</a></td><td><a href="/spaces/LRpSaJsexNNZj4aUWtpO/pages/7bUgcIpQtaDV7j12azBW">/spaces/LRpSaJsexNNZj4aUWtpO/pages/7bUgcIpQtaDV7j12azBW</a></td></tr><tr><td><strong>Torchmate CNC Plasma</strong></td><td></td><td></td><td><a href="/files/6F66X5F2xsrSM9tUkAum">/files/6F66X5F2xsrSM9tUkAum</a></td><td><a href="/spaces/LRpSaJsexNNZj4aUWtpO/pages/msvFxZUsgNg6R3c9CSIK">/spaces/LRpSaJsexNNZj4aUWtpO/pages/msvFxZUsgNg6R3c9CSIK</a></td></tr><tr><td><strong>Powermatic Drill Press</strong></td><td></td><td></td><td><a href="/files/Ano2ihZ2w3EGL0yUpJYw">/files/Ano2ihZ2w3EGL0yUpJYw</a></td><td></td></tr><tr><td><strong>Jet Horizontal Arm Saw</strong></td><td></td><td></td><td><a href="/files/EMSA7HRZwTRYvkVbeb1l">/files/EMSA7HRZwTRYvkVbeb1l</a></td><td></td></tr><tr><td><strong>Sheldon Lathe</strong></td><td></td><td></td><td><a href="/files/QETZFwRXCHvuHioHas0i">/files/QETZFwRXCHvuHioHas0i</a></td><td><a href="/spaces/LRpSaJsexNNZj4aUWtpO/pages/FU8M1iwGyD4cXHtmS3a1">/spaces/LRpSaJsexNNZj4aUWtpO/pages/FU8M1iwGyD4cXHtmS3a1</a></td></tr><tr><td><strong>Sherline Mini Mill</strong></td><td></td><td></td><td><a href="/files/BB3ZltVBu9K4ke1Phlgw">/files/BB3ZltVBu9K4ke1Phlgw</a></td><td><a href="/spaces/LRpSaJsexNNZj4aUWtpO/pages/Pfvl0jvUjCmmp3ArctKs">/spaces/LRpSaJsexNNZj4aUWtpO/pages/Pfvl0jvUjCmmp3ArctKs</a></td></tr></tbody></table>

## Woodworking

<table data-view="cards"><thead><tr><th></th><th></th><th></th><th data-hidden data-card-cover data-type="files"></th><th data-hidden data-card-target data-type="content-ref"></th></tr></thead><tbody><tr><td><strong>CNC Router</strong></td><td></td><td></td><td><a href="/files/AH5ajI10hgrmTwosUNEo">/files/AH5ajI10hgrmTwosUNEo</a></td><td><a href="/spaces/0PJmexmrIX77SaWrkvzC/pages/CfSlzzP2hK6DuI9uXt2i">/spaces/0PJmexmrIX77SaWrkvzC/pages/CfSlzzP2hK6DuI9uXt2i</a></td></tr><tr><td><strong>Dewalt Table Saw</strong></td><td></td><td></td><td><a href="/files/IjEQJVEjiF0nbFr8sywN">/files/IjEQJVEjiF0nbFr8sywN</a></td><td></td></tr><tr><td><strong>Jet Band Saw</strong></td><td></td><td></td><td><a href="/files/RZAXMMm3l0lT7uU2AaIl">/files/RZAXMMm3l0lT7uU2AaIl</a></td><td></td></tr><tr><td><strong>Dewalt Planer</strong></td><td></td><td></td><td><a href="/files/RPoiC0RAT23mlFXp25ke">/files/RPoiC0RAT23mlFXp25ke</a></td><td></td></tr></tbody></table>

## STEM / Robotics / Service Projects

Firestorm Robotics is now one of the most equipped teams in Georgia. All they need now are more high school kids who are interested in STEM and Trade Skills.

<table data-view="cards"><thead><tr><th></th><th></th><th></th><th data-hidden data-card-cover data-type="files"></th><th data-hidden data-card-target data-type="content-ref"></th></tr></thead><tbody><tr><td><strong>Firestorm Robotics</strong></td><td>Advanced STEM skills to build competition robots.</td><td><em><strong>FIRST</strong></em> Robotics</td><td><a href="/files/xckSSVmPZu6f3itMTjMg">/files/xckSSVmPZu6f3itMTjMg</a></td><td><a href="https://wiki.firestormrobotics.org">https://wiki.firestormrobotics.org</a></td></tr><tr><td><strong>e-NABLE</strong></td><td>Create 3D printed upper limb assistive devices.</td><td></td><td><a href="/files/GKf8Rcah1YNUi0ubXJ1O">/files/GKf8Rcah1YNUi0ubXJ1O</a></td><td><a href="/spaces/VTEnAZSzcQycufPZxRvI/pages/EYgEZy2ls4k2amtG5Z1r">/spaces/VTEnAZSzcQycufPZxRvI/pages/EYgEZy2ls4k2amtG5Z1r</a></td></tr><tr><td><strong>Go Baby Go</strong></td><td>Let kids explore the world via independent mobility</td><td>Adaptive Wheelchairs</td><td><a href="/files/GcvkmVqr7xgbQDiZngb5">/files/GcvkmVqr7xgbQDiZngb5</a></td><td></td></tr></tbody></table>


# Makerspace Rules

Applies to all areas of the makerspace. Ignorance is not an excuse.

{% hint style="danger" %}
[**Read the Wiki for the equipment**](/index) you plan to use. If you break it, you will be responsible for bringing it back to its original or operating condition.
{% endhint %}

## Access

* **24-hour Access:** This is a privilege. The last one to leave should turn off all the lights, close the doors (especially to the shop area), set the alarm, and lock the door.
* **Kids under 18:** MUST have a supervising adult family member at all times.
* **Firestorm Robotics:** In addition to the rules on this page, the entire team is required to comply with these [additional rules](/index/cherokee-makerspace/makerspace-rules/firestorm-robotics).
* **Guests:** Members can bring their guests but only as an observer and they can't enter the shop area, especially when the equipment is running.
* **Consumables:** (filaments, resins, sandpaper, drill bits, end mills, etc.) are not provided by Makerspace. Some consumables are donated, and they are there for your convenience. If you break them, please replace them.
* **Supplies:** (lumber, metals, plastic, etc.) are also not provided, but some [scrap supplies](#scrap-materials) in the shop are free or may be provided with a donation.

## Cleaning Up

{% hint style="info" %}
Kindly pick up after yourself before you leave. Sweep, wipe or vacuum. **Pretty please!**
{% endhint %}

1. **NO FOOD:** No food or containers containing liquids are allowed in trash cans. Empty snack bags or water bottles are ok if disposed of in the trash can near the water cooler by the door.. Bring your food back home with you.
2. Leave the place cleaner than when you found it.

## Project Storage

{% hint style="warning" %} <mark style="color:red;">We have limited space. If you are not coming back to work on your project for a few days, please bring your stuff home or rent a locker.</mark>
{% endhint %}

1. **Worktables:** Our worktables are for active projects.&#x20;
2. **Storage Lockers:** There are lockers available for rent in the resin/laser room and in the shop area. Bring your own lock and send a message to the shop manager so we can update your account.

## Scrap Materials

{% hint style="warning" %}
The rule is, if you didn't bring it in, and it's unlabeled, it's not yours. Don't assume it's available.
{% endhint %}

1. Scrap materials painted with <mark style="color:orange;">**ORANGE**</mark> belong to Cherokee Makersapace, <mark style="color:red;">**RED**</mark> belongs to Firestorm Robotics, and <mark style="color:purple;">**PURPLE**</mark> is free to use.
2. Scrap metal in the shop is available in exchange for a scrap value donation. Please ask the shop manager beforehand.


# Firestorm Robotics

Robotics Team refers to parents, mentors, and students in this section.

* Access to Makerspace and the Firestorm room by the Robotics team is strictly for activities related to FRC 6341 only.
* Mentors and Parents may not work on personal projects unless they possess a valid Individual or Family membership.
* Students may work on 1 personal project at a time. Please store all materials and unfinished projects inside the robotics room or bring them home.
* All students must have a supervising adult, mentor, or parent at all times.&#x20;
* Conditionally, some students may be allowed to work by themselves with parental permission. **It must be approved by Cherokee Makerspace. Waiver required.**
* Only Lead Mentor 1 and Lead Mentor 2 will have app access to the doors and alarm system.
* Cherokee Makerspace tools should not be brought into the robotics room.&#x20;
* Robotics Team is expected to clean up after each meeting. The team is required to be present during Makerspace clean-up days. All trash receptacles must be emptied, with the trash taken to the dumpster every Saturday. Dumpster pick-up is every other Monday.


# History

<figure><img src="/files/rM9CV52SW5M82LgS4b2w" alt=""><figcaption><p>Initial Interest Meeting - May 2019.</p></figcaption></figure>

### Work Tables

<div><figure><img src="/files/JstTxDgXCWvq7yupj4qu" alt=""><figcaption><p>BEFORE: Just a bare open space with an FRC robot.</p></figcaption></figure> <figure><img src="/files/LEwChJpBrt0X2FAk9u6A" alt=""><figcaption><p>AFTER: Folding work tables from JTDFF.</p></figcaption></figure></div>

### Robotics Room

Firestorm Robotics used to occupy a smaller room, but within a few years, we had to move them into a room twice the size.

<div><figure><img src="/files/cLnFD8YcMgVCc3ZZeWLT" alt=""><figcaption><p>BEFORE: Pre-2020 Planned Robotics Room</p></figcaption></figure> <figure><img src="/files/2VH0UpbWvClcZjVlpYeW" alt=""><figcaption><p>AFTER: Pre-2020 Firestorm Room</p></figcaption></figure></div>

<div><figure><img src="/files/O95EBGpvZOxUEl0arzRc" alt=""><figcaption><p>BEFORE: 2022 Planned Robotics Room.</p></figcaption></figure> <figure><img src="/files/YDoTkWPbtEo0oeiFUbAP" alt=""><figcaption><p>AFTER: 2022 Firestorm Robotics Room</p></figcaption></figure></div>


# How to Donate

## Direct / Recurring Donations

When you donate to Cherokee Makerspace, you help fund the operating costs, equipment upgrades, and maintenance. It also reduces the overhead of [Firestorm Robotics](https://wiki.firestormrobotics.org) and helps keep the robotics program viable.

* Donate or support our projects on [Givebutter](https://givebutter.com/cherokee-makerspace).
* text "MAKERSROCK" to 53-555.

## Donate Equipment and Supplies

* [Amazon Wish List](https://a.co/7ScHmTf)
* [Hydraulic Press](https://givebutter.com/cm-hpress)
* [4 Axis DRO](https://givebutter.com/cm-lathe-dro)
* [Wazer Waterjet](https://givebutter.com/wazer)

## Support Our Service Projects

<table data-view="cards"><thead><tr><th></th><th></th><th></th></tr></thead><tbody><tr><td><strong>e-Nable</strong></td><td>Create 3D printed upper limb assistive devices.</td><td><strong>Status:</strong> Registration</td></tr><tr><td><strong>Plastic Shredder</strong></td><td>Reduce plastic waste by recycling 3D printed parts.</td><td><strong>Status:</strong> Researching</td></tr><tr><td></td><td></td><td></td></tr></tbody></table>

## Amazon Smile

When you shop at [AmazonSmile](https://smile.amazon.com/ch/82-2172132), Amazon will donate to Cherokee Makerspace. Support your makerspace every time you shop.

* Remember to [set Amazon Smile in the Amazon Shopping App](https://www.amazon.com/b?ie=UTF8\&node=15576745011) when using your mobile device.


# Financial Sponsors

The following organizations support our mission of providing equal opportunities to expand technical knowledge and trade skills to people of all ages.

## Cherokee Office of Economic Development

## Cobb EMC Foundation

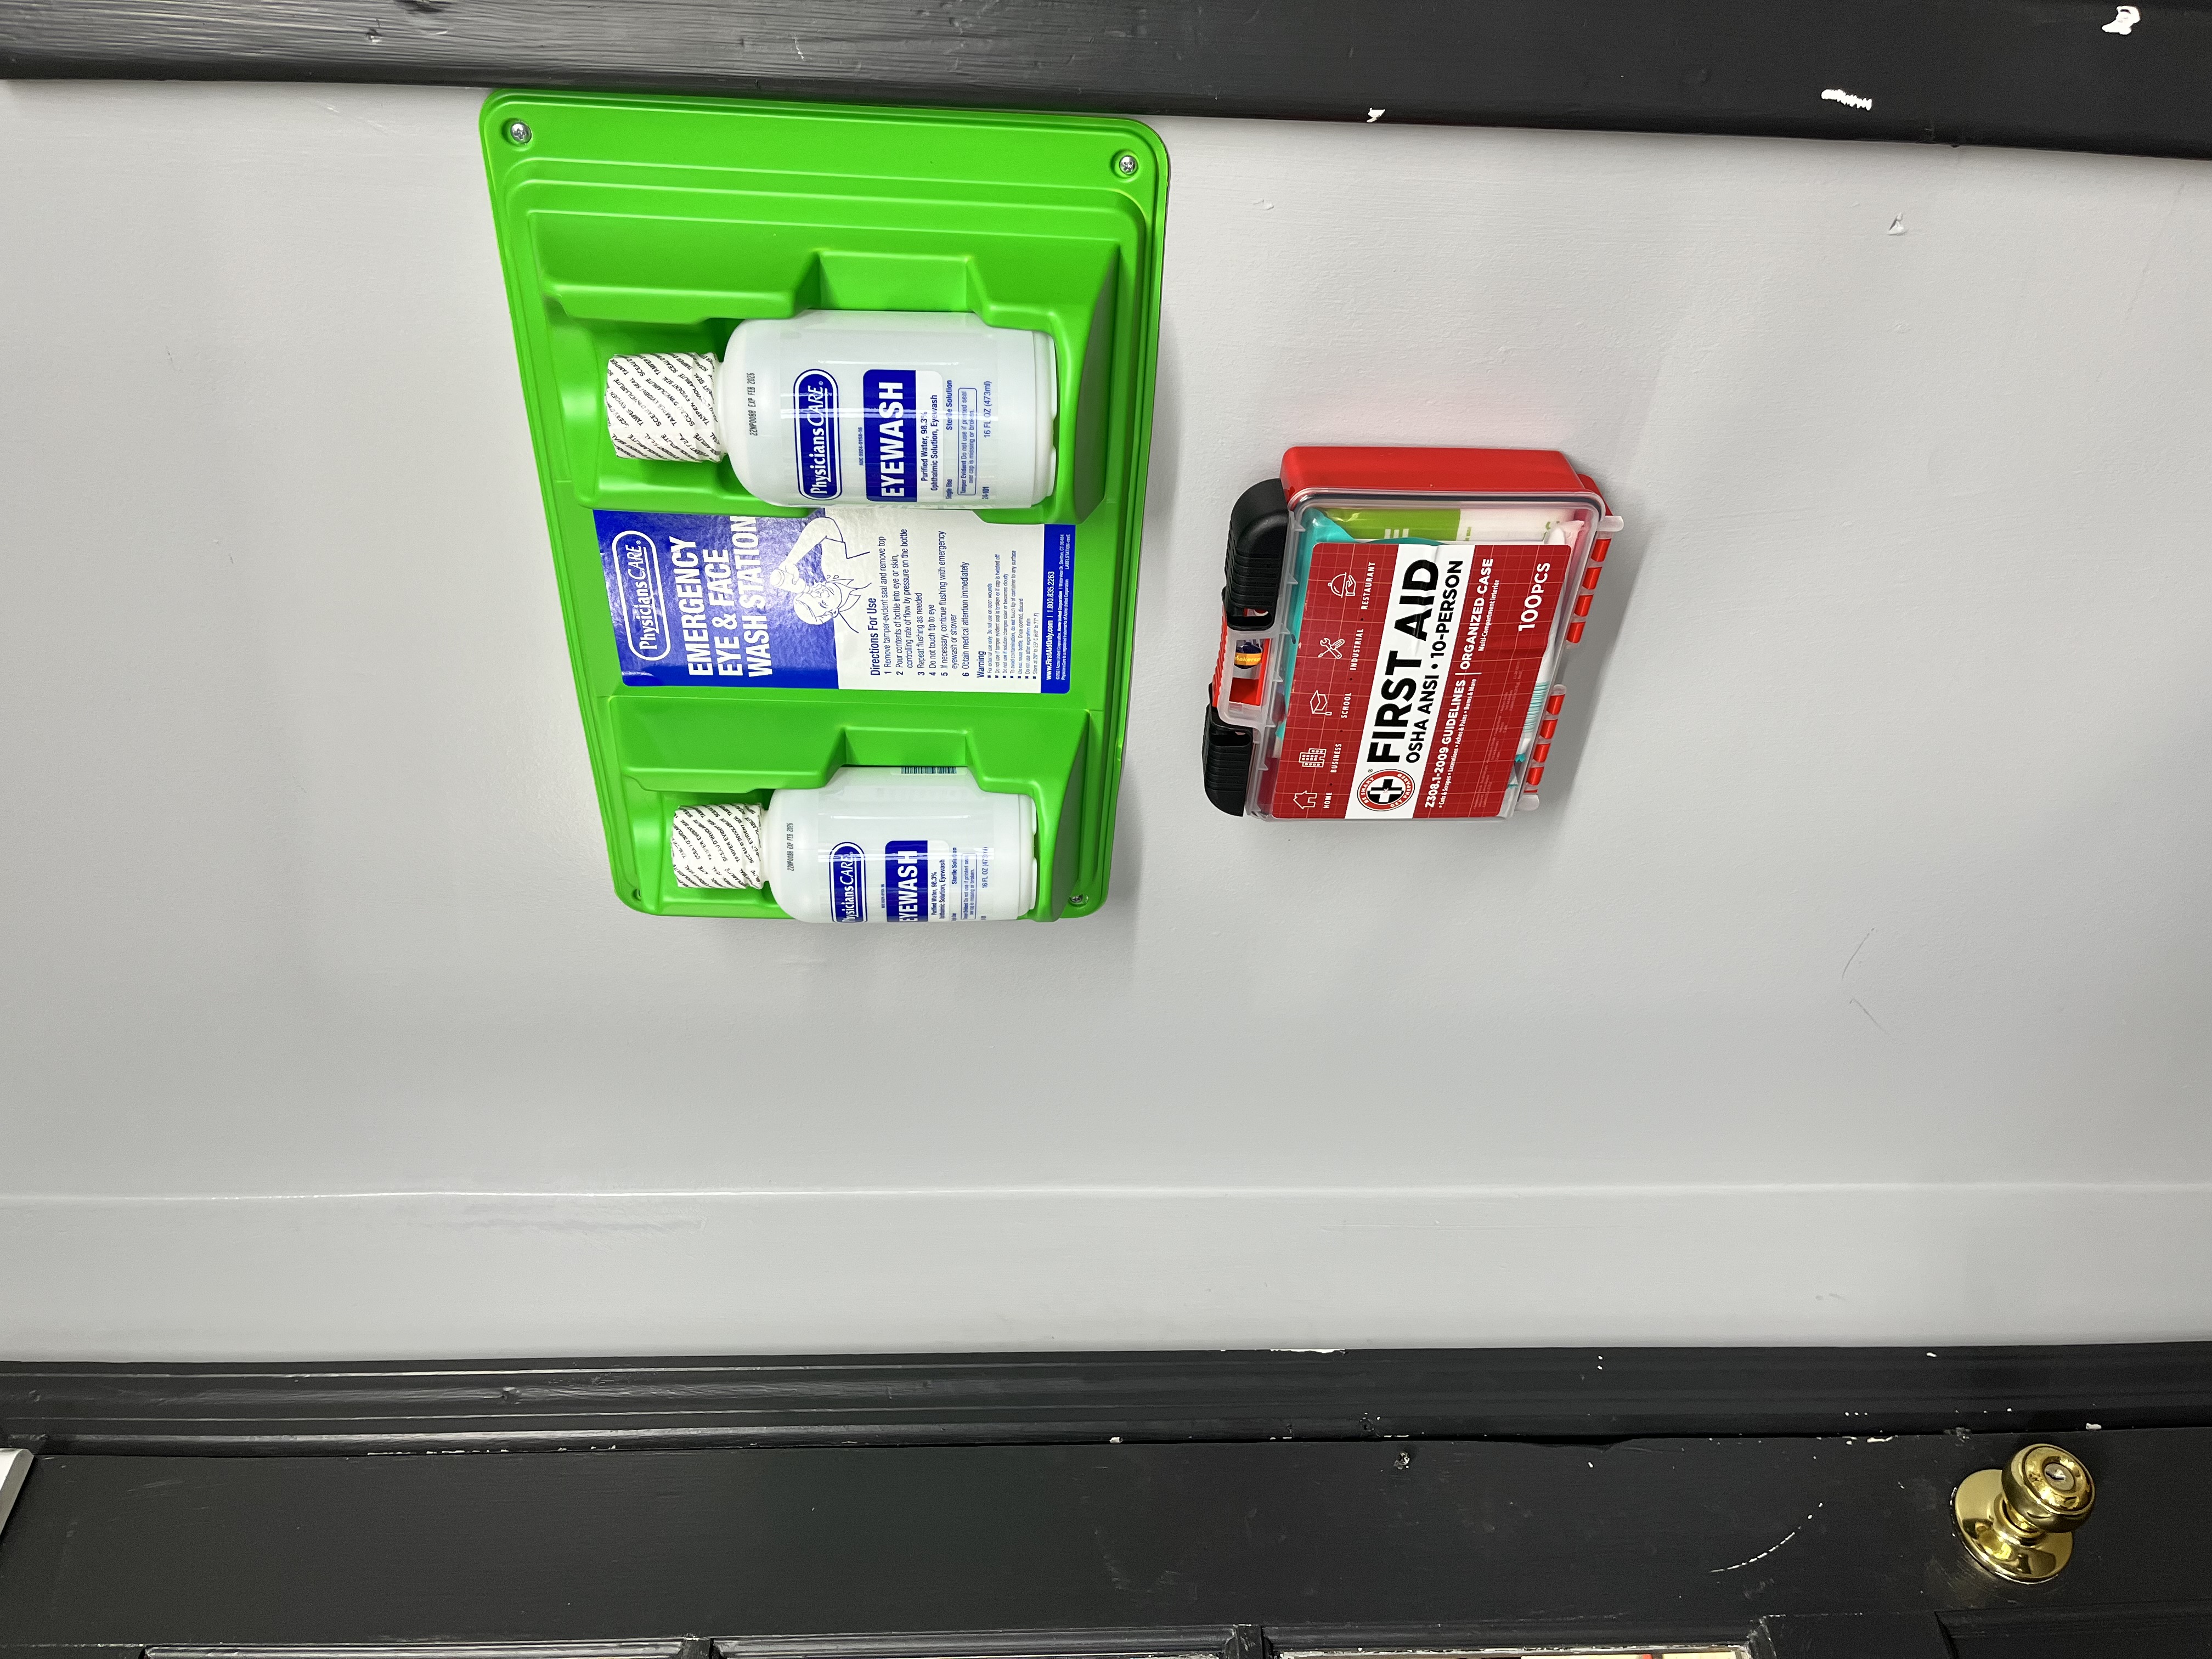
We've enhanced our safety program and upgraded our equipment through [Cobb EMC](https://cobbemc.com/cobb-emc-foundation)'s Operation Round Up.

<div><figure><img src="/files/EsMwUhZrAlm0fPrElLJo" alt=""><figcaption></figcaption></figure> <figure><img src="/files/0D8vVFMIP6WlGdaPOYjY" alt=""><figcaption></figcaption></figure> <figure><img src="/files/s2buVk6d1ASFdPa2Xmd5" alt=""><figcaption></figcaption></figure></div>


# In-Kind Sponsors

Thank you for your continued support!

## [Georgia *FIRST* Robotics](http://gafirst.org/)

<figure><img src="/files/6F66X5F2xsrSM9tUkAum" alt=""><figcaption><p>CNC Plasma</p></figcaption></figure>

## [Jason T. Dickerson Family Foundation](https://www.jasontdickersonfamilyfoundation.org/)

<div><figure><img src="/files/gSddqw2yvejo048WiRnM" alt=""><figcaption><p>Anycubic Mono X Resin Printer</p></figcaption></figure> <figure><img src="/files/LEwChJpBrt0X2FAk9u6A" alt=""><figcaption><p>Lifetime Folding Workstations</p></figcaption></figure></div>

## [Morrison Products](https://morrisonproducts.com/)

<div><figure><img src="/files/RpaqRB6F8QXJYt7SKaN7" alt=""><figcaption><p>Bridgeport Mill</p></figcaption></figure> <figure><img src="/files/QETZFwRXCHvuHioHas0i" alt=""><figcaption><p>Sheldon Lathe</p></figcaption></figure></div>

## Hammocks HVAC / R\&D Mechanical

R\&D Mechanical donated the HVAC system, and [Hammocks HVAC](https://www.hammockshvac.com/) provided the labor and ductwork to complete the installation.

<div><figure><img src="/files/cAqhMExlLCMJ7NechsTy" alt=""><figcaption><p>Existing ductwork removal by Firestorm members.</p></figcaption></figure> <figure><img src="/files/cXKGAbF1Elja1ViYMNre" alt=""><figcaption><p>5-ton HVAC donation by R&#x26;D Mechanical</p></figcaption></figure></div>


# New Members

## Where Are We?

We are located in 6436 Hwy 92 S100 Acworth, GA 30102.

## A Brief History&#x20;

Cherokee Makerspace was started by [Firestorm Robotics,](https://wiki.firestormrobotics.org) our in-house, high school FIRST Robotics team. The team opened up their workshop to community makers to help defray the cost of the program to families.

## How to Join

1. Choose the [Membership Package](https://www.cherokeemakerspace.org/packages/) that applies to you.
2. Read and Sign the e-Waiver that's e-mailed to you.
3. In a few days, you will receive an invitation from our membership portal, [Fabman](https://fabman.io/manage/1710/). Please complete the sign-up and add your credit card information. If you don't receive the Fabman e-mail, let us [e-mail us](mailto:inspire@cherokeemakerspace.org) right away.

{% hint style="info" %}
Renew your subscription, change your package and book equipment hours with Fabman.
{% endhint %}

## Before You Visit

Install the following apps on your phone:

* [August](https://august.com/pages/app) - for our door lock.
* Ring ([Apple](https://apps.apple.com/us/app/ring-always-home/id926252661) | [Google](https://play.google.com/store/apps/details?id=com.ringapp\&hl=en_US\&gl=US)) - our alarm system.
* Slack ([Apple](https://apps.apple.com/us/app/slack/id618783545) | [Google](https://play.google.com/store/apps/details?id=com.Slack)) - our community messaging system.

Please bring a valid ID for verification. We need proof of senior or service status.

## Changing Plans / Pause / Canceling

You can upgrade, downgrade or cancel your subscription by sending a Slack message to Terri Talton or Alexander Cua. Please allow up to 2 weeks for us to get to it. Please follow up after a week. We may have overlooked it.

**Leaving?** We hate to see you go. Just remember, when you close your account, everything about you will magically vaporize from Fabman, August, and Ring. You have to start over with a blank slate when you come back.

### Help Us Spread the Word

Follow us on [Facebook](https://www.facebook.com/cherokeemakerspace), [Instagram](https://www.instagram.com/cherokeemakerspace/), and [Meetup](https://www.meetup.com/Cherokee-Makerspace/)!


# Volunteers

## Alexander Cua&#x20;

Founder

## Terri Talton

Shop Manager

## Bill Keppel

Membership and Outreach


# Slack Channels

## Default Channels

New members will be included in these channels automatically.

* **#announcements** - The latest news from the Makerspace.
* **#events** -&#x20;
* **#random** - Non-work banter, water cooler conversation.
* **#safety** - Anything related to shop safety.
* **#setup** - Updates, repairs, and maintenance requests for our makerspace. If it is regarding a specific equipment, please go to the respective channel.
* **#workbench** - Any project you want to work on with the makerspace members.

### Equipment

* \#3dp-filament - 3D-printing with filaments (FFF)
* \#3dp-resin - 3D-printing with liquid resins (SLA)
* \#cnc-plasma - Lincoln CNC plasma table
* \#cnc-router - CNC Router
* \#cnc-sherline - Sherline CNC Mill
* \#laser - 40w 20"x12" and 150w lasers, Lightburn.
* \#metalworking - Mill / Lathe / Hydraulic Press
* \#welding

### Special Interest

* \#first-robotics - FIRST Tech Challenge and FIRST Robotics Competition
* \#girl-scouts
* \#home-automation - (proposed)
* \#vanlife


# Safety Guidelines

1. Wear approved eye Regular prescription eyewear or sunglasses are NOT acceptable.
2. Long hair must be tied back into a ponytail or bun, or secured under a hat.
3. Suitable clothing is required. Loose clothing must be fastened or restrained. Roll up long sleeves to the elbows.
4. Only closed toe shoes may be worn in the shop (No sandals).
5. Caution any other student if you see them performing an unsafe act.
6. Frayed or damaged cords must not be used and need to be reported to Makerspace management.
7. Use a brush to clear away chips. Use a rag or paper towels to clean up oily areas.
8. Keep the floor and work surfaces clear of scraps and litter.
9. Immediately wipe or mop up any liquids spilled on the floor.
10. Use care in handling and storing large, heavy, or long pieces of material.
11. Put tools back in place when not in use.
12. Don’t over reach. Keep a secure footing and balance at all times.
13. Use a ladder to reach high objects. Under no circumstances should you climb on a chair or other nonapproved object.


# Portable Electric Tools

* Make sure the power switch is off before you plug in the tool.
* Be sure the cord has an intact grounding prong if it was designed with one. If the grounding prong is damaged or missing, please do not use the tool and report it to Makerspace management.
* Inspect cords for damage before using the tool.
* Do not use equipment in wet areas.
* Always secure the work. Use clamps or a vise to hold work rather than holding it with your hands.
* Remove adjusting keys and chuck wrenches before turning the tool on.
* Disconnect tools from power before making adjustments or when changing accessories such as blades, bits, cutters,


# Powered Equipment

* Do not operate any machine until you have completed the training on it.
* Wear extra eye protection such as a face shield when in situations creating high eye hazard potentials such as grinders etc. This is IN ADDITION to your normal safety glasses.
* Start and stop your own machine. Remain with it until it has come to a complete stop.
* Only one person should operate a machine unless the process requires a helper.
* Always allow a safe distance between your hands and blades or rotating parts. Keep fingers in such a position that there is no danger of fingers slipping into the cutter or other moving parts.
* Keep the machine clear of tools, scraps, and other items.
* Keep the floor around machines clear of liquids, scraps, tools, and materials.
* Give the machine your undivided attention while you are using it. Do not look away to talk to others.


# 3D Printing

{% hint style="danger" %}
[**Book your usage on Fabman.**](https://fabman.io/) Other members need to know.

Always read this page before you use it. We will post the latest changes and updates.&#x20;
{% endhint %}

### Filament Printers

* **Bring your filament:** The <mark style="color:purple;">**"unobtainium"**</mark> filaments are free to use. Give, and you shall receive.
* **Stick around for the first few layers:** First-layer adhesion is critical to printing success.
* **Unload when done:** Remove your prints and unload the filament. For overnight prints, please leave a note on Slack with instructions.
* **Report any issues:** We can't fix it if we don't know it's broken.

<table><thead><tr><th width="264.8445927431152">Model</th><th width="149">Remote</th><th>Notes</th></tr></thead><tbody><tr><td>Prusa i3 Mk3.5 (CM01)</td><td>Prusa Connect</td><td>0.6 CHT</td></tr><tr><td>Prusa i3 Mk3.5 (CM02)</td><td>Prusa Connect</td><td>0.6 CHT</td></tr><tr><td>Prusa i3 Mk3.5 (CM03)</td><td>Prusa Connect</td><td>E3D Revo</td></tr><tr><td>Prusa i3 Mk3.5 (CM04)</td><td>Prusa Connect</td><td>E3D Revo</td></tr><tr><td>Elegoo Orangestorm Giga</td><td></td><td></td></tr></tbody></table>

### Resin Printers

* **Bring your resin:** The "unobtainium" resins are free to use. Give, and you shall receive.
* **PPE needed:** <mark style="color:red;">Resin is toxic. Wear gloves.</mark> Tools should not be brought out of the room.
* **Clean Up:** Wipe all spills.

| Model              | Notes |
| ------------------ | ----- |
| Anycubic Mono X    |       |
| Phrozen Shuffle XL |       |


# Drying Filaments

Dry filament is vital for successful 3D prints. We have a dehydrator in our 3D printing room for this purpose.

{% hint style="info" %}
Please do not discard the resealable bags that come with your filament. If you are not using a dry box, put your spools back in the bag when you are done printing.
{% endhint %}

### Recommended Drying Time

<table><thead><tr><th width="150">Material</th><th width="150">Temperature</th><th>Time</th></tr></thead><tbody><tr><td>Dessicant</td><td></td><td></td></tr><tr><td>ABS</td><td>65°C (149°F)</td><td>3h+</td></tr><tr><td>PETG</td><td>65°C (149°F)</td><td>3h+</td></tr><tr><td>PLA</td><td>50°C (122°F)</td><td>3h+</td></tr><tr><td></td><td></td><td></td></tr></tbody></table>


# Resources

The following links are a must read for anyone who desires to know the ins and outs of 3D printing:

## Filaments

* [3D Printer Filament Types](https://all3dp.com/1/3d-printer-filament-types-3d-printing-3d-filament/) - All3DP
* [3D Printing Temperatures](https://all3dp.com/2/the-best-printing-temperature-for-different-filaments/) - All3DP
* [Filament Properties Table](https://www.simplify3d.com/support/materials-guide/properties-table/) - Simplify3D

## Printing

* [Perfect First Layer](https://www.matterhackers.com/articles/3d-printing-essentials-first-layer) - Matterhackers
* [PrusaSlicer Infill Patterns](https://help.prusa3d.com/article/infill-patterns_177130) - Prusa
* [Print Quality Troubleshooting Guide](https://www.simplify3d.com/support/print-quality-troubleshooting/) - Simplify3D
* [Calibrating 3D Printer](https://all3dp.com/2/how-to-calibrate-a-3d-printer-simply-explained/) - All3DP

## 3D Models

* [Benchy](https://www.3dbenchy.com/) - 3D Printer Torture Test
* [Bed Leveling Calibration](https://www.thingiverse.com/thing:34558) - Thingiverse
* [Temperature Calibration Tower](https://www.thingiverse.com/thing:2729076) - Thingiverse
* [XYZ Calibration Cube](https://www.thingiverse.com/thing:1278865) - Thingiverse


# Prusa i3 Series

Models: Mk2.5, Mk3s, Mk3.5

{% hint style="info" %}
[**Prusa Connect**](https://connect.prusa3d.com/): Available on our Prusa Mk3 and Mk3.5 printers.
{% endhint %}


# Elegoo OrangeStorm Giga

Large format 800mm x 800mm x 1000mm FFF 3D-printer.

#### Links

* [Elegoo Product Page](https://us.elegoo.com/products/orangestorm-giga)


# Cube Pro

These printers have been extensively modified in-house. Only the enclosure, slides, motors, chamber heater and power supply carried over from the original 3D Systems Cube Pro.

## Printer Specifications

Both Cube Pro printers use a [BTT Octopus](/index/3d/mods/btt-octopus) controller and OctoPrint Server built in.

{% tabs %}
{% tab title="Cube Bondtech" %}

## Cube Pro Bondtech

**Build Volume:** 295x280x215

{% hint style="info" %}
**Vanadium Nozzles** - Compatible with abrasive filaments such as Carbon Fiber, Nylon X, and Nylon G.
{% endhint %}

### Quick Start

* Always **Home** the printer before **Loading Filament**.
* Cut a wedge at the end of the filament and insert it into the filament tube until it comes out at the other end. Then insert the end into the extruder.

<table><thead><tr><th width="147">Accessory</th><th width="214">Component</th><th>Notes</th></tr></thead><tbody><tr><td>Extruder</td><td><a href="https://www.bondtech.se/product/bmg-m-extruder/">Bondtech BMG-M</a></td><td></td></tr><tr><td>Hot End</td><td><a href="https://www.sliceengineering.com/products/mosquito-magnum-hotend">Slice Mosquito Magnum</a></td><td>450°C <a href="https://www.sliceengineering.com/products/vanadium-nozzle?variant=29783462510664">Vanadium Nozzle</a></td></tr></tbody></table>
{% endtab %}

{% tab title="Cube Hemera" %}

## Cube Pro Hemera

**Build Volume:** 280x270x230

{% hint style="warning" %}
**Hand Swappable Brass Nozzles -** Only use pure plastic filaments. For abrasive filaments such as Carbon Fiber, Glass and Wood, use the Cube Pro Bondtech.
{% endhint %}

<table><thead><tr><th width="133">Accessory</th><th width="180">Component</th><th>Notes</th></tr></thead><tbody><tr><td>Extruder</td><td>E3D Hemera</td><td>Short filament path for flexible filaments.</td></tr><tr><td>Hot End</td><td>300°C Revo</td><td>Brass Nozzles (0.25, 0.40, 0.60. 0.80)</td></tr></tbody></table>

### Z-Offset

<table><thead><tr><th width="147.66666666666666">Nozzle Size</th><th width="110">Z-Offset</th><th>Notes</th></tr></thead><tbody><tr><td></td><td></td><td></td></tr></tbody></table>
{% endtab %}
{% endtabs %}


# Resin Printer Settings

### Resources

{% embed url="<https://4dfiltration.com/resources/resin-print-settings.html>" %}

{% embed url="<https://makertrainer.com/wiki/Master_MSLA_printer_settings_spreadsheet>" %}


# BTT Octopus

![](/files/gt6lvEGylngD2hp0zCGE)

{% hint style="info" %}
Pin Wiring Sequence is Top to Bottom, Left to Right
{% endhint %}

<table><thead><tr><th width="155.33333333333331">Connector</th><th width="204">Device</th><th>Comments</th></tr></thead><tbody><tr><td>EXP1</td><td>LCD Display (EXP1)</td><td></td></tr><tr><td>EXP2</td><td>LCD Display (EXP2)</td><td></td></tr><tr><td>TFT</td><td>LCD Display (RS-232)</td><td></td></tr><tr><td>MOTOR0</td><td>X Motor</td><td></td></tr><tr><td>MOTOR1</td><td>Y Motor</td><td></td></tr><tr><td>MOTOR2</td><td>Z Motor</td><td></td></tr><tr><td>MOTOR4</td><td>E Motor</td><td></td></tr><tr><td>FAN0</td><td>24v Layer Fan</td><td>Pins: + - | Jump bottom row header pins</td></tr><tr><td>FAN1</td><td>24v Extruder Fan</td><td>Pins: + - | Jump bottom row header pins</td></tr><tr><td>FAN2</td><td>24v Chamber Fan</td><td>Pins: + - | Jump bottom row header pins</td></tr><tr><td>FAN6</td><td>12v Controller Cooling</td><td>Pins: + - | Jump middle row header pins</td></tr><tr><td>FAN7</td><td>12v Enclosure Light</td><td>Pins: + - | Jump middle row header pins</td></tr><tr><td>HE0</td><td>24v Cartridge Heater</td><td>No polarity</td></tr><tr><td>HE2</td><td>24v Chamber Heater</td><td>Pins: + - | Solid state relay</td></tr><tr><td>STOP0</td><td>X Limit Switch</td><td>Pins: 3.3v GND Signal | 3.3v not used</td></tr><tr><td>STOP1</td><td>Y Limit Switch</td><td>Pins: 3.3v GND Signal | 3.3v not used</td></tr><tr><td>BL Touch</td><td>BL Touch</td><td>Pins: GND 5v Y-Signal | GND W-Signal</td></tr><tr><td>TB</td><td>Bed Thermistor</td><td>No polarity</td></tr><tr><td>T0</td><td>Hotend Thermistor</td><td>No polarity</td></tr><tr><td>T2</td><td>Chamber Thermistor</td><td>No polarity</td></tr></tbody></table>

### BTT Octopus Setup Guides

* [Octopus Setup Guide](https://www.makenprint.uk/3d-printing/3d-printing-guides/3d-printer-mainboard-installation-guides/btt-octopus-guides/btt-octopus-setup-guide/)
* [Wiring and Marlin Setup Guide](https://3dwork.io/en/btt-octopus/)
* [Sensorless Guide](https://3dwork.qitec.net/guias-impresion-3d/mejoras-upgrades/nivelacion/sensorless-homing-en-marlin)
* [Neopixel Guide](https://3dwork.qitec.net/guias-impresion-3d/mejoras-upgrades/otras-mejoras/leds-neopixel)

#### User Guide

{% file src="/files/nMYVyldtODsgtqY8L96s" %}
BTT Octopus User Guide
{% endfile %}


# Cube Pro Bondtech

Our Cube Pro / Bondtech BMG-M / Slice Mosquito Magnum Retrofit

We weren't sure we could pull this off so we didn't have step by step documentation of the build process. This page will be updated soon with all the 3D models, wiring instructions and Marlin 2.1 configuration so that you can perform the mod yourself.

## Gantry Modifications

<div align="left"><figure><img src="/files/Je6ZdzqXRKAGUCDDP9A3" alt=""><figcaption><p>First Attempt</p></figcaption></figure> <figure><img src="/files/rRFi3gSiftS7riLaDeRq" alt=""><figcaption><p>Third Attempt</p></figcaption></figure></div>

**First Attempt:** Original gantry. This solution was less than ideal since Bondtech Extruder doesn't fit between the original linear bearing blocks. We designed a spacer to go between the extruder and hot end.

**Third Attempt:** LM12UU bearings are mounted on half bearing blocks and secured with zip ties. One LM12UU in front and two at the back. The more compact design allows for a more powerful blower and a closer fitment for the BL Touch bed leveling sensor. This design also increased the total build space to 295mm x 280mm x 215mm from the stock 285mm x 270mm x 230mm. The slight loss of z height was caused by dropping the head between the rails.


# Laser Cutting

This section is maintained by Alexander Cua.

## Schedule on FabMan before use

{% hint style="warning" %}
[**Book your usage on Fabman.**](https://fabman.io/) Other members need to know.
{% endhint %}

## Lightburn Software

{% hint style="success" %}
This machine has been upgraded and no longer uses the outdated Retina Engrave software.
{% endhint %}

We have a Macbook running [Lightburn](https://lightburnsoftware.com/pages/trial-version-try-before-you-buy) beside the machine but if you prefer to have your own copy, Makerspace members can get up to 70% off.

Go to File - Import Prefs to load the latest Lightburn preferences. Always check this page to update your your software with the latest settings.

{% file src="/files/4tK2epkszXaJpe4pSbeK" %}
Lightburn Preferences
{% endfile %}

## Starting the Laser

* [ ] Use the power strip as the main power switch.
* [ ] Chiller must be running laser equipment is on. Chiller water must be flowing through the laser tube.
* [ ] Remove grate and clean up any debris from previous operation.
* [ ] Check lenses and mirrors and make sure they are clean.
* [ ] Check that exhaust fan is working.
* [ ] Check that air pump is working.

## Using the Laser

* Make sure the item you want to cut and engrave is in the [approved material list](/index/laser/materials-list).
* Lay material flat on the grate and use the focusing billet to set the correct distance between your work piece and the laser cone.


# Materials List

## Approved Materials

<table><thead><tr><th>Material</th><th width="150">Thickness</th><th>Notes</th></tr></thead><tbody><tr><td>Acrylic / Plexiglas</td><td>1/4"</td><td></td></tr><tr><td>Delrin</td><td></td><td></td></tr><tr><td>Kapton Tape</td><td></td><td></td></tr><tr><td>Mylar</td><td></td><td></td></tr><tr><td>Paper / Cardstock</td><td></td><td></td></tr><tr><td></td><td></td><td></td></tr><tr><td></td><td></td><td></td></tr></tbody></table>

## <mark style="color:red;">Never Use</mark>

<mark style="color:red;">Any material that has a glue backing is not allowed. The glue will vaporize and may damage the lens.</mark>

| Material                         | Safety Hazard               | Notes        |
| -------------------------------- | --------------------------- | ------------ |
| ABS                              | Melts / cyanide             |              |
| Epoxy                            |                             |              |
| Fiberglass                       |                             |              |
| Food                             |                             |              |
| High Density Polyethylene (HDPE) | Catches fire & melts        | Milk bottles |
| Polycarbonate (PC)               |                             |              |
| Polypropylene Foam               |                             |              |
| Polystyrene                      |                             |              |
| Polyvinyl Chloride (PVC)         | Emits chlorine gas when cut |              |
|                                  |                             |              |


# Full Spectrum 20x12

Donated by Bob Kovacs - Mad Designs.

## Status

Operational. Camera overlay still needs work.

### Configuration

This machine has been [upgraded](/index/laser/equipment/full-spectrum-20x12/fsl-hobby-ruida-retrofit) and no longer uses the outdated Retina Engrave software. Use the following settings for Lightburn or download our [latest custom preferences](/index/laser).

* 45w Laser Tube
* Width x Height: 505mm x 305mm
* Origin: Upper Right
* IP Address: 192.168.1.20

### Scanning Offset

The following settings are not fully tested and may change over time. Please check back often.

| Speed | Line Shift | Initial Offset |
| ----- | ---------- | -------------- |
| 100   | 0.70       | 0              |
| 400   | 2.60       | 0              |

### Focus Lens Options

![](/files/pBTTIgoidVuogbdzttrG)

**1.5” lens** is appropriate for extra fine engravings such as fonts below 6pts.

**2.0” lens\*** has a good combination of fine engraving and thin cutting for fonts between 6pts and 8pts.

**2.5” lens** is appropriate for cutting up to ¼” of material and engraving detail to around 8pts.

**5.0” lens** is for cutting thick foam. it is also a good lens for engraving into deep bowls, when more room is needed.

**\***&#x54;his is the included lens for Hobby Series Lasers.


# Line Mode

Line mode can be used to cut through material or burn an outline around an engraving.

## Recommended Settings

<mark style="color:red;">**Maximum Power should never exceed 85% for longer lamp life. Just add passes to compensate.**</mark>

<table><thead><tr><th>Material</th><th width="150">Max/Min</th><th>Passes</th></tr></thead><tbody><tr><td>1/8" Plywood</td><td>75/28</td><td>9±2</td></tr><tr><td></td><td></td><td></td></tr><tr><td></td><td></td><td></td></tr></tbody></table>


# Fill Mode

Fill mode used to be called scan.

## Recommended Settings

<mark style="color:red;">**Maximum Power should never exceed 85% for longer lamp life. Just add passes to compensate.**</mark>


# Maintenance

### Parts

{% tabs %}
{% tab title="Electronics" %}

* [Cloudray 40w Laser Tube](https://amzn.to/3panrtp)
* [Cloudray 40w Power Supply](https://amzn.to/3e9bfTb)
  {% endtab %}

{% tab title="Optics" %}

#### Focus Lens

* FL:38.1mm ZnSe focus lens D:20mm ([Amazon](https://amzn.to/3N68ukP))
* FL:50.8mm ZnSe focus lens D:20mm ([Amazon](https://amzn.to/3xDKP5t))
* FL:63.5mm ZnSe focus lens D:20mm ([Amazon](https://amzn.to/3xy4kwe))

Focus lenses are also available from [AliExpress](https://www.aliexpress.com/item/2251832048011950.html) under a single listing.

#### Mirrors

* T:3mm D:20mm laser mirrors, set of 3 ([Amazon](https://amzn.to/3Hyrl6Z), [AliExpress](https://amzn.to/3Hyrl6Z))
  {% endtab %}
  {% endtabs %}

### Maintenance Log

* 12/19/21 - Replaced Laser Tube


# FSL Hobby Ruida Retrofit

Our Hobby laser was in working when we got it but Retina Engrave leaves much to be desired. Lightburn would open up lots of new functionality and retrofitting a Ruida controller is a necessary step.

![Our retrofitted FSL with Ruida. Shown with our Ruida Mount, Ammeter / Relay Case and Wall Hugger Vent.](/files/V0pab3Yt6FXLGNT5EAXs)

## Components

#### Required

* 1 - [Ruida 6445](https://amzn.to/3E9u1Vi) controller
* 2 - [DM322E](https://www.automationdirect.com/adc/shopping/catalog/motion_control/stepper_systems/stepper_drives/dm322e) stepper driver (3 if you have a rotary axis)
* 2 - [limit switches](https://amzn.to/3FaSwmk)
* 1 - [water flow sensor](https://amzn.to/3GO3oH8)
* [lever nuts](https://amzn.to/33IcAi2)

#### Optional

* 1 - [0 to 30A ammeter](https://amzn.to/3FexjYv)
* 2 - [24V LED indicator lights](https://amzn.to/3meLi9i)
* 2 - [solid state relay](https://amzn.to/3J6WGy2)
* 2 - [panel mount outlet](https://amzn.to/3p9EdIS)


# Power Supply Connections

![](/files/Qnx2ZGKZEwsEsntMBPB9)

### Terminal Blocks

| Left Terminal Block (PS1) | Connect to     |
| ------------------------- | -------------- |
| L-                        | Laser Tube     |
| FG                        | Chassis Ground |
| AC                        | 120v (White)   |
| AC                        | 120v (Black)   |

| Middle Terminal Block (PS2) | Connect to               |
| --------------------------- | ------------------------ |
| G                           |                          |
| P                           |                          |
| L                           | Ruida: \[CN5]-2 (L-On1)  |
| G                           | Ruida: \[CN5]-1 (Ground) |
| IN                          | Ruida: \[CN5]-3 (LPWM1)  |
| 5V                          |                          |

| Right Terminal Block (PS3) | Connect to      |
| -------------------------- | --------------- |
| 24V                        | Ruida: \[CN0]-1 |
| G                          | Ruida: \[CN0]-2 |
| 5V                         | Laser Pointer   |
| L                          |                 |


# DM322E Connections

![DM322E Stepper Driver](/files/ic2HMk40vghynxtbkM1K)

### Terminal Blocks

| Left Terminal Block (DM1) | Connect to         |
| ------------------------- | ------------------ |
| B-                        | Stepper Motor B-   |
| B+                        | Stepper Motor B+   |
| A-                        | Stepper Motor A-   |
| A+                        | Stepper Motor A+   |
| +Vdc                      | Ruida \[PW3] - 24v |
| GND                       | Ruida \[PW3] - G   |

| Right Terminal Block (DM2) | Ruida 6445 Terminal Block |
| -------------------------- | ------------------------- |
| ENA                        | \[AXIS Block]-3 +5v       |
| OPTO                       | \[AXIS Block]-3 +5v       |
| DIR                        | \[AXIS]-1 DIR/CCW         |
| PUL                        | \[AXIS]-2 PUL/CW          |

### DIP Switch Setting

| Switch | On / Off |
| ------ | -------- |
| SW1    |          |
| SW2    |          |
| SW3    |          |
| SW4    |          |
| SW5    |          |
| SW6    |          |


# Ruida 6445 Connections

![](/files/ZMHToaoatGB4yjPYMmqd)

| AXIS-X, AXIS-Y | DM322 (DM2) |
| -------------- | ----------- |
| 1 - DIR/CCW    | DIR         |
| 2 - PUL/CW     | PUL         |
| 3 - +5v        | ENA & OPTO  |

| CN0      | Power Supply (PS3) |
| -------- | ------------------ |
| 1 - GND  | G                  |
| 2 - +24v | 24v                |

| CN1        | Connect to            |
| ---------- | --------------------- |
| 4 - Status | Relay for Exhaust Fan |
| 5 - Wind   | Relay for Air Pump    |

| CN2        | Connect to           |
| ---------- | -------------------- |
| 3 - DrProc | Magnetic Door Switch |

| CN4       | Connect to     |
| --------- | -------------- |
| 2 - LmtY- | Limit Y Switch |
| 4 - LmtX- | Limit X Switch |

| CN5       | Power Supply (PS2) |
| --------- | ------------------ |
| 1 - GND   | G                  |
| 2 - L-On1 | L                  |
| 3 - LPWM1 | IN                 |


# 3D Models

The following models are free for you to download and use in your printers.

### Ruida Controller Mount

{% file src="/files/zRiSHBcJ6Z0zxn11sfUi" %}

### Ammeter and Relay Box

{% file src="/files/tXbmz2ofjksG5oI9QtWs" %}

{% file src="/files/wdaORT9T5rl5L8bsMfZZ" %}

### Wall Hugger Exhaust Vent

{% file src="/files/EPdVSly2JbJYNNN2Yiuo" %}

{% file src="/files/DxAZMIlHDQIboDiDJXIY" %}


# Metalworking


# Feeds and Speeds

## Aluminum

| Tool          |  RPM | Entry IPM | Contour IPM | Z Step |
| ------------- | ---: | --------: | ----------: | -----: |
| 1/8" End Mill | 5000 |        16 |          18 |   0.04 |
| 1/4" End Mill | 4500 |        18 |          20 |    0.1 |
| 3/8" End Mill | 4000 |        18 |          20 |  0.125 |
| 1/2" End Mill | 3500 |        18 |          20 | 0.1875 |

## Resources

* <https://littlemachineshop.com/mobile/speeds_feeds.php>
* <https://www.bu.edu/epic/engineering-product-innovation-center/additional-information/lab-resources/>


# Sherline

This page is maintained by Alexander Cua.

{% hint style="success" %}
This mill is on loan from Alexander Cua. Please reach out to him before using.
{% endhint %}

## Getting Started

Max Travel: X200mm Y160mm Y160mm

## Buildbotics Controller

This machine uses a Buildbotics controller and has a touchscreen and web interface. Toolpaths generated by [VCarve Pro](/index/software/vcarve-pro), MasterCAM, or any other CAM software may be used as long as they are configured properly.

## Preflight Check

* Add a few drops of light machine oil to the two oil cups to ensure slides and screws stay lubricated while in use.

## Spindle

### 10,000 RPM Pulley

| Position | Speed    |
| -------- | -------- |
| 270°     | 340 RPM  |
| 0°       | 3300 RPM |
| 90°      | 6280 RPM |
| 180°     | 8900 RPM |


# From CAD to CAM

The Buildbotics controller is configured to use metric (mm) units.

## Importing DXF in VCarve Pro

{% hint style="info" %}
A DXF file doesn't specify workspace units. A 1" square drawn in millimeters will be exported as a 25.4 x 25.4. As of version 11, VCarve assumes DXF files are in inches.&#x20;
{% endhint %}

* Import the DXF file from your CAD drawing
* Select all the imported entities and **Join Vectors**.
* If needed, rescale the drawing by using **Set Selected Objects Size** in the Transform Objects group, check **Link XY,** and enter <mark style="color:green;">\*i=</mark> in the Width(X) or Width(Y) at the end of the dimension. It will convert the metric dimensions automatically to inches.


# Buildbotics Setup

## Motor Configuration

* Drive Current: 2
* Idle Current: 0
* Microsteps: 32
* Max Velocity: 0.66 (520 rpm) \[NEMA #23 Max: 530]
* Max Accel: 8.826
* Max Jerk: 50
* Step Angle: 1.8
* Travel / Rev: 1.27mm

## Homing

* Stall Microstep: 8
* Search Velocity: 0.66
* Stall Volts: 6
* Stall Sample Time: 50
* Stall Current: 0.2
* Zero Backoff: 5


# Plasma

This page is maintained by Terri Talton.


# Router

## Getting Started

Our CNC Router is primarily used for woodworking but may be used to cut 1/8" aluminum sheets or 1/4" plastic sheets.

{% hint style="info" %}
Information about our [CNC Router](/index/metal/cnc/router) is maintained in the Woodworking Section.
{% endhint %}


# Bridgeport Mill

This page is maintained by Terri Talton.


# Sheldon Lathe

This page is maintained by Terri Talton.


# Woodworking

This section is maintained by Terri Talton and Alexander Cua

## Rules

* **Bring your own lumber.** Free materials provided by the makerspace or donated by members will be marked accordingly.
* **Clean up when done.**&#x20;
* **Report any malfunctions.** We can't help fix it if we don't know it's broken.


# Feeds and Speeds

## Acrylic

| Tool          |  RPM | Plunge Rate | Feed Rate | Z Step |
| ------------- | ---: | ----------: | --------: | -----: |
| 1/8" End Mill | 4465 |          15 |        17 |  0.625 |
| 1/4" End Mill | 4250 |          19 |        21 |  0.125 |
| 3/8" End Mill | 4040 |          19 |        21 | 0.1875 |
| 1/2" End Mill | 3825 |          19 |        21 |   0.25 |

## HDPE

| Tool          |  RPM | Plunge | Feed | Z Step |
| ------------- | ---: | -----: | ---: | -----: |
| 1/8″ End Mill | 5000 |     18 |   20 |  .0625 |
| 1/4″ End Mill | 4500 |     22 |   25 |   .125 |
| 3/8″ End Mill | 4000 |     22 |   25 |  .1875 |
| 1/2″ End Mill | 3500 |     22 |   25 |    .25 |

## Polycarbonate

| Tool          |  RPM | Plunge | Feed | Z Step |
| ------------- | ---: | -----: | ---: | -----: |
| 1/8" End Mill | 5250 |     18 |   20 |  0.625 |
| 1/4" End Mill | 5000 |     22 |   25 |  0.125 |
| 3/8" End Mill | 4750 |     22 |   25 | 0.1875 |
| 1/2" End Mill | 4500 |     22 |   25 |   0.25 |


# CNC Router

AVID Pro CNC with UGRA Spindle

## <mark style="color:red;">Important - You Break It, You Fix it</mark>

1. **Get the latest updates** by reading this page before you use it. <mark style="color:red;">**ALWAYS!**</mark>
2. For best results, **reboot computer** before each job.
3. **Do an Air Cut.** Always test your toolpath first.
4. **Shut down** CNC controller and computer when the job is complete.
5. **Clean up** after you are done. Follow the rules to keep your CNC router privileges.

## <mark style="color:green;">Rules</mark>

* **Bring your own router bits and end mills.**
* **Use a spoil-board.** Spoil-board should be larger than the piece you are cutting so that it can be adequately secured to the surface. There may be some spoil-boards under the CNC Router.
* **Bring your own lumber.** There may be some scraps that are free to use and they will be marked accordingly:
  * <mark style="color:purple;">**Purple - Free to use by Members**</mark>
  * <mark style="color:orange;">**Orange - Reserved for Makerspace Projects**</mark>
  * <mark style="color:red;">**Red - Reserved for Firestorm Robotics**</mark>
* **Always clean up.** The dust collector will not capture 100% of the sawdust. You need to vacuum the surface, under and around the machine and any part where sawdust has accumulated.
* **Leave no trace.** Do not leave your scraps here unless it is big enough to be useful to others. Scraps should be trimmed square so the outline of your artwork is no longer visible. If our scrap area is full, then everything goes out with you.

## Mach3 Controller

Router uses [Mach3](https://www.machsupport.com/software/mach3/). Toolpaths generated by [MasterCAM](https://www.mastercam.com/), [VCarve Pro](/index/wood/cnc-router/vcarve-pro) or any compatible CAM system can be used as long as they are configured properly.

## Workholding

1/2" T-tracks, spaced 12"x12" provides a lot of clamping flexibility. Since the tracks are only 1/4" from the surface, a **separate spoil-board is required** when using the router.

## Auto Tool Zero

{% embed url="<https://youtu.be/hadV7dslCTg>" %}


# VCarve Pro

Makerspace Edition

The computer connected to the router has [VCarve Pro Makerspace Edition](#undefined) installed. Members can install the free VCarve Pro Makerspace Client Edition on their own machines. The client edition lets you do everything the Makerspace Edition except saving toolpaths. Just save your work to a flash drive and save the toolpath when you are at the makerspace.

## How to Use

We are not going to reinvent the wheel. Vectric has a lot of [informative VCarve Pro videos](https://www.vectric.com/support/tutorials/vcarve-pro) on their site. Beginners must watch **The Basics** and finish the rest as needed.

## Configuration

Our router is configured to use the long side as the X-axis (landscape mode). This way, when you are standing in front of the computer screen but facing the machine, the X-axis goes left to right, Y-axis goes from nearer to farther as expected. The machine homes on X-min and Y-min.

<div align="left"><figure><img src="/files/gfhBhJiet8KLu8J5Mzx5" alt=""><figcaption></figcaption></figure></div>


# Router Zamboni

Vacuum clean the table surface automatically using a path similar to a Zamboni machine.

{% file src="/files/j1ovsIZmFwhHcVSj5XX7" %}

## Instructions

* Make sure router surface is clear. Raise spindle about 6" off the surface.
* Remove endmills.
* Install dust brush attachment.
* Click on **Ref All Home.**
* Zero the X and Y Axis.
* Lower the spindle until dust brush touches the surface then lower another 1/4".
* Zero the Z Axis.
* Run the program.


# Router Resurfacing

Resurface the CNC router and make the surface smooth again.

{% hint style="danger" %}
**Shop Manager Only:** Members should not resurface the table.
{% endhint %}

<figure><img src="/files/vZyoiPXCflDL8p4Szsnf" alt=""><figcaption></figcaption></figure>

This toolpath uses a 3" surfacing bit. There is a -1.5" offset on the Y-axis so that you can Set Y Zero using the edge of the surfacing bit. It has a cutting depth of 0.02" (0.508 mm).

{% hint style="danger" %}
Depth of cut of more than 2mm may cause the spindle to stall due to overcurrent if there are high spots on the surface. Always do an initial cut well above the surface to check accuracy since this toolpath uses the entire surface of the bed.
{% endhint %}

## Instructions

* Make sure router surface is clear. Raise spindle about 2" off the surface.
* Click on **Ref All Home**
* Zero the X Axis
* Move the Y Axis until the edge of the cutting bit is on top of the edge of the board.

{% file src="/files/6Z2rzf5NGRLqnBhdalxW" %}
Resurfacing VCarve File
{% endfile %}

{% file src="/files/OeQ1EOVsQPnh6ka19dzN" %}
Resurfacing Toolpath
{% endfile %}


# T Slots Installation

{% hint style="danger" %}
Shop Manager Only:&#x20;
{% endhint %}

<figure><img src="/files/lFciprwA3sysyObCYR0y" alt=""><figcaption></figcaption></figure>

This toolpath uses a 3/8" end mill. Origin is at the lower right corner of the bed outside the MDF sheet. It has a cutting depth of 0.9".

{% file src="/files/Y6ibHNlQJGxZ8Rfahm7R" %}

{% file src="/files/o8cV8m5gfkArKmdixjSR" %}


# Hitachi WJ200 VFD

### Links

* [Hitachi WJ200 Product Page](https://www.hitachi-iesa.com/ac-drives-inverters/wj-200-series)
* [Hitachi WJ200 Quick Reference](https://www.hitachi-iesa.com/sites/default/files/supportdocs/NT3251X.pdf)
* [Hitachi Wj200 Instruction Manual](https://www.hitachi-iesa.com/sites/default/files/supportdocs/WJ200_Instruction_NT325X.pdf)

### UGRA Spindle Settings

The following settings were provided by UGRA CNC. These are the last good known setting for the VFD. In most cases, you should not need to change these settings.

If any of the firmware setting was changed and the spindle no longer operates, you may need to do a factory reset and manually enter the settings below.

<table><thead><tr><th width="150">Menu</th><th width="150">Value</th><th width="347.2">Notes</th></tr></thead><tbody><tr><td>B037</td><td>0</td><td>Unlock parameters</td></tr><tr><td>A001</td><td>2</td><td>Frequency source<br>Set to 1 to enable potentiometer</td></tr><tr><td>A002</td><td>2</td><td>Run command source</td></tr><tr><td>A004</td><td>400</td><td>Max frequency</td></tr><tr><td>A003</td><td>400</td><td>Base frequency</td></tr><tr><td>A082</td><td>220</td><td>AVR voltage</td></tr><tr><td>A044</td><td>3</td><td>Set Sensorless Vector Control<br>Will not work with 2 motors per drive</td></tr><tr><td>B012</td><td></td><td>Set equal to motor amperage</td></tr><tr><td>H002</td><td>2</td><td>Motor constant selection</td></tr><tr><td>H003</td><td>2.2</td><td>Motor capacity</td></tr><tr><td>H004</td><td>2</td><td>Poles setting</td></tr><tr><td>H001</td><td>2 -> Run</td><td>Run spindle. Auto detection<br>___ should appear when successful</td></tr><tr><td>B083</td><td></td><td>Increase value in case of weird sound. Read manual.</td></tr><tr><td>F001</td><td>400</td><td>Control spindle speed by setting this parameter. Can be changed while spindle is on.</td></tr></tbody></table>


# Lightburn


# VCarve Pro

## VCarve Pro Makerspace Edition

Cherokee Makerspace uses the Makerspace Edition of VCarve Pro. It allows members to install the Makerspace Client Edition on their own machines and just bring the files to the makerspace to generate the toolpaths and cut with the machines in the space.

{% hint style="warning" %}
Files created with VCarve Pro Trial that has not been unlocked will not work with our Makerspace Edition.
{% endhint %}

### Installing Makerspace Client Version

* Download the latest [VCarve Pro Trial Edition](https://www.vectric.com/products/vcarve-pro).
* To allow the files you create with to be used at the Cherokee Makerspace, unlock the trial by going to **Help - About** and  then **Enter Makerspace ID**.&#x20;

{% hint style="info" %}
Makerspace ID: 1B813-A8395-28618-CF272-10D01-C4DC6-02D10
{% endhint %}

* **Restart VCarve Pro.** It will now identify itself as the Makerspace Client Edition.


# Colors

<table><thead><tr><th width="150">Color</th><th width="150">Pantone</th><th width="150">Hex</th><th width="150">CMYK</th><th>RGB</th></tr></thead><tbody><tr><td>CM Red</td><td><a href="https://www.pantone.com/color-finder/484-C">484 C</a></td><td>9A3324</td><td>1 90 92 33</td><td>154 51 36</td></tr><tr><td>CM Orange</td><td><a href="https://www.pantone.com/color-finder/135-C">135 C</a></td><td>FFC658</td><td>0 18 72 0</td><td>255 198 88</td></tr><tr><td>CM Green</td><td><a href="https://www.pantone.com/color-finder/362-C">362 C</a></td><td>509E2F</td><td>66 0 100 9</td><td>80 158 47</td></tr><tr><td>CM Teal</td><td><a href="https://www.pantone.com/color-finder/3155-C">3155 C</a></td><td>006271</td><td>100 0 25 47</td><td>0 98 113</td></tr><tr><td>CM Gray</td><td>Cool Gray 10 C</td><td>63666A</td><td>57 46 40 25</td><td>99 102 106</td></tr></tbody></table>


# Horizontal

#### PNG Format

![148x40](/files/UyHWDKV6MhiipULXhilT) ![296x80](/files/w1DtT0wIzKUm279sraOK) ![592x160](/files/x0xURQVYiUaWhw871xYc)


# Vertical


# Icons

#### PNG Format

![32px](/files/LHVyComTronzt3AaOzOh) ![57px](/files/2CPvFw9bmkLzrPZksOHI) ![72px](/files/FQbCrOOGhwWsDILMkpZD) ![114px](/files/6gVeKJ4zbumEBfsqvqcv) ![144px](/files/Zph72kRKuM6WYv9cGYk6)


# e-NABLE

Free 3D Printed Prosthetics

e-NABLE is an online global community of “Digital Humanitarian” volunteers from all over the world who are using their 3D printers to make free and low-cost prosthetic upper limb devices for children and adults in need. The open-source designs created by e-NABLE Volunteers help those who were born missing their fingers and hands or who have lost them due to war, natural disaster, illness, or accidents.


# 3D Printing

{% hint style="danger" %}
[**Book your usage on Fabman.**](https://fabman.io/) Other members need to know.

Always read this page before you use it. We will post the latest changes and updates.&#x20;
{% endhint %}

### Filament Printers

* **Bring your filament:** The <mark style="color:purple;">**"unobtainium"**</mark> filaments are free to use. Give, and you shall receive.
* **Stick around for the first few layers:** First-layer adhesion is critical to printing success.
* **Unload when done:** Remove your prints and unload the filament. For overnight prints, please leave a note on Slack with instructions.
* **Report any issues:** We can't fix it if we don't know it's broken.

<table><thead><tr><th width="264.8445927431152">Model</th><th width="149">Remote</th><th>Notes</th></tr></thead><tbody><tr><td>Prusa i3 Mk3.5 (CM01)</td><td>Prusa Connect</td><td>0.6 CHT</td></tr><tr><td>Prusa i3 Mk3.5 (CM02)</td><td>Prusa Connect</td><td>0.6 CHT</td></tr><tr><td>Prusa i3 Mk3.5 (CM03)</td><td>Prusa Connect</td><td>E3D Revo</td></tr><tr><td>Prusa i3 Mk3.5 (CM04)</td><td>Prusa Connect</td><td>E3D Revo</td></tr><tr><td>Elegoo Orangestorm Giga</td><td></td><td></td></tr></tbody></table>

### Resin Printers

* **Bring your resin:** The "unobtainium" resins are free to use. Give, and you shall receive.
* **PPE needed:** <mark style="color:red;">Resin is toxic. Wear gloves.</mark> Tools should not be brought out of the room.
* **Clean Up:** Wipe all spills.

| Model              | Notes |
| ------------------ | ----- |
| Anycubic Mono X    |       |
| Phrozen Shuffle XL |       |


# Drying Filaments

Dry filament is vital for successful 3D prints. We have a dehydrator in our 3D printing room for this purpose.

{% hint style="info" %}
Please do not discard the resealable bags that come with your filament. If you are not using a dry box, put your spools back in the bag when you are done printing.
{% endhint %}

### Recommended Drying Time

<table><thead><tr><th width="150">Material</th><th width="150">Temperature</th><th>Time</th></tr></thead><tbody><tr><td>Dessicant</td><td></td><td></td></tr><tr><td>ABS</td><td>65°C (149°F)</td><td>3h+</td></tr><tr><td>PETG</td><td>65°C (149°F)</td><td>3h+</td></tr><tr><td>PLA</td><td>50°C (122°F)</td><td>3h+</td></tr><tr><td></td><td></td><td></td></tr></tbody></table>


# Resources

The following links are a must read for anyone who desires to know the ins and outs of 3D printing:

## Filaments

* [3D Printer Filament Types](https://all3dp.com/1/3d-printer-filament-types-3d-printing-3d-filament/) - All3DP
* [3D Printing Temperatures](https://all3dp.com/2/the-best-printing-temperature-for-different-filaments/) - All3DP
* [Filament Properties Table](https://www.simplify3d.com/support/materials-guide/properties-table/) - Simplify3D

## Printing

* [Perfect First Layer](https://www.matterhackers.com/articles/3d-printing-essentials-first-layer) - Matterhackers
* [PrusaSlicer Infill Patterns](https://help.prusa3d.com/article/infill-patterns_177130) - Prusa
* [Print Quality Troubleshooting Guide](https://www.simplify3d.com/support/print-quality-troubleshooting/) - Simplify3D
* [Calibrating 3D Printer](https://all3dp.com/2/how-to-calibrate-a-3d-printer-simply-explained/) - All3DP

## 3D Models

* [Benchy](https://www.3dbenchy.com/) - 3D Printer Torture Test
* [Bed Leveling Calibration](https://www.thingiverse.com/thing:34558) - Thingiverse
* [Temperature Calibration Tower](https://www.thingiverse.com/thing:2729076) - Thingiverse
* [XYZ Calibration Cube](https://www.thingiverse.com/thing:1278865) - Thingiverse


# Prusa i3 Series

Models: Mk2.5, Mk3s, Mk3.5

{% hint style="info" %}
[**Prusa Connect**](https://connect.prusa3d.com/): Available on our Prusa Mk3 and Mk3.5 printers.
{% endhint %}


# Elegoo OrangeStorm Giga

Large format 800mm x 800mm x 1000mm FFF 3D-printer.

#### Links

* [Elegoo Product Page](https://us.elegoo.com/products/orangestorm-giga)


# Cube Pro

These printers have been extensively modified in-house. Only the enclosure, slides, motors, chamber heater and power supply carried over from the original 3D Systems Cube Pro.

## Printer Specifications

Both Cube Pro printers use a [BTT Octopus](/index/equipment/mods/btt-octopus) controller and OctoPrint Server built in.

{% tabs %}
{% tab title="Cube Bondtech" %}

## Cube Pro Bondtech

**Build Volume:** 295x280x215

{% hint style="info" %}
**Vanadium Nozzles** - Compatible with abrasive filaments such as Carbon Fiber, Nylon X, and Nylon G.
{% endhint %}

### Quick Start

* Always **Home** the printer before **Loading Filament**.
* Cut a wedge at the end of the filament and insert it into the filament tube until it comes out at the other end. Then insert the end into the extruder.

<table><thead><tr><th width="147">Accessory</th><th width="214">Component</th><th>Notes</th></tr></thead><tbody><tr><td>Extruder</td><td><a href="https://www.bondtech.se/product/bmg-m-extruder/">Bondtech BMG-M</a></td><td></td></tr><tr><td>Hot End</td><td><a href="https://www.sliceengineering.com/products/mosquito-magnum-hotend">Slice Mosquito Magnum</a></td><td>450°C <a href="https://www.sliceengineering.com/products/vanadium-nozzle?variant=29783462510664">Vanadium Nozzle</a></td></tr></tbody></table>
{% endtab %}

{% tab title="Cube Hemera" %}

## Cube Pro Hemera

**Build Volume:** 280x270x230

{% hint style="warning" %}
**Hand Swappable Brass Nozzles -** Only use pure plastic filaments. For abrasive filaments such as Carbon Fiber, Glass and Wood, use the Cube Pro Bondtech.
{% endhint %}

<table><thead><tr><th width="133">Accessory</th><th width="180">Component</th><th>Notes</th></tr></thead><tbody><tr><td>Extruder</td><td>E3D Hemera</td><td>Short filament path for flexible filaments.</td></tr><tr><td>Hot End</td><td>300°C Revo</td><td>Brass Nozzles (0.25, 0.40, 0.60. 0.80)</td></tr></tbody></table>

### Z-Offset

<table><thead><tr><th width="147.66666666666666">Nozzle Size</th><th width="110">Z-Offset</th><th>Notes</th></tr></thead><tbody><tr><td></td><td></td><td></td></tr></tbody></table>
{% endtab %}
{% endtabs %}


# Resin Printer Settings

### Resources

{% embed url="<https://4dfiltration.com/resources/resin-print-settings.html>" %}

{% embed url="<https://makertrainer.com/wiki/Master_MSLA_printer_settings_spreadsheet>" %}


# BTT Octopus

![](/files/gt6lvEGylngD2hp0zCGE)

{% hint style="info" %}
Pin Wiring Sequence is Top to Bottom, Left to Right
{% endhint %}

<table><thead><tr><th width="155.33333333333331">Connector</th><th width="204">Device</th><th>Comments</th></tr></thead><tbody><tr><td>EXP1</td><td>LCD Display (EXP1)</td><td></td></tr><tr><td>EXP2</td><td>LCD Display (EXP2)</td><td></td></tr><tr><td>TFT</td><td>LCD Display (RS-232)</td><td></td></tr><tr><td>MOTOR0</td><td>X Motor</td><td></td></tr><tr><td>MOTOR1</td><td>Y Motor</td><td></td></tr><tr><td>MOTOR2</td><td>Z Motor</td><td></td></tr><tr><td>MOTOR4</td><td>E Motor</td><td></td></tr><tr><td>FAN0</td><td>24v Layer Fan</td><td>Pins: + - | Jump bottom row header pins</td></tr><tr><td>FAN1</td><td>24v Extruder Fan</td><td>Pins: + - | Jump bottom row header pins</td></tr><tr><td>FAN2</td><td>24v Chamber Fan</td><td>Pins: + - | Jump bottom row header pins</td></tr><tr><td>FAN6</td><td>12v Controller Cooling</td><td>Pins: + - | Jump middle row header pins</td></tr><tr><td>FAN7</td><td>12v Enclosure Light</td><td>Pins: + - | Jump middle row header pins</td></tr><tr><td>HE0</td><td>24v Cartridge Heater</td><td>No polarity</td></tr><tr><td>HE2</td><td>24v Chamber Heater</td><td>Pins: + - | Solid state relay</td></tr><tr><td>STOP0</td><td>X Limit Switch</td><td>Pins: 3.3v GND Signal | 3.3v not used</td></tr><tr><td>STOP1</td><td>Y Limit Switch</td><td>Pins: 3.3v GND Signal | 3.3v not used</td></tr><tr><td>BL Touch</td><td>BL Touch</td><td>Pins: GND 5v Y-Signal | GND W-Signal</td></tr><tr><td>TB</td><td>Bed Thermistor</td><td>No polarity</td></tr><tr><td>T0</td><td>Hotend Thermistor</td><td>No polarity</td></tr><tr><td>T2</td><td>Chamber Thermistor</td><td>No polarity</td></tr></tbody></table>

### BTT Octopus Setup Guides

* [Octopus Setup Guide](https://www.makenprint.uk/3d-printing/3d-printing-guides/3d-printer-mainboard-installation-guides/btt-octopus-guides/btt-octopus-setup-guide/)
* [Wiring and Marlin Setup Guide](https://3dwork.io/en/btt-octopus/)
* [Sensorless Guide](https://3dwork.qitec.net/guias-impresion-3d/mejoras-upgrades/nivelacion/sensorless-homing-en-marlin)
* [Neopixel Guide](https://3dwork.qitec.net/guias-impresion-3d/mejoras-upgrades/otras-mejoras/leds-neopixel)

#### User Guide

{% file src="/files/nMYVyldtODsgtqY8L96s" %}
BTT Octopus User Guide
{% endfile %}


# Cube Pro Bondtech

Our Cube Pro / Bondtech BMG-M / Slice Mosquito Magnum Retrofit

We weren't sure we could pull this off so we didn't have step by step documentation of the build process. This page will be updated soon with all the 3D models, wiring instructions and Marlin 2.1 configuration so that you can perform the mod yourself.

## Gantry Modifications

<div align="left"><figure><img src="/files/Je6ZdzqXRKAGUCDDP9A3" alt=""><figcaption><p>First Attempt</p></figcaption></figure> <figure><img src="/files/rRFi3gSiftS7riLaDeRq" alt=""><figcaption><p>Third Attempt</p></figcaption></figure></div>

**First Attempt:** Original gantry. This solution was less than ideal since Bondtech Extruder doesn't fit between the original linear bearing blocks. We designed a spacer to go between the extruder and hot end.

**Third Attempt:** LM12UU bearings are mounted on half bearing blocks and secured with zip ties. One LM12UU in front and two at the back. The more compact design allows for a more powerful blower and a closer fitment for the BL Touch bed leveling sensor. This design also increased the total build space to 295mm x 280mm x 215mm from the stock 285mm x 270mm x 230mm. The slight loss of z height was caused by dropping the head between the rails.